

Why Building Your Own Cold Plunge Makes Perfect Sense
Let's be honest: the cost of a commercial cold plunge tub can be eye-watering. For many looking to improve their wellness, the price is just too high. This is why a growing number of people are choosing the DIY route, opting for a hands-on approach and saving a significant amount of money. This trend reflects a desire for affordability and the freedom to personalize.
Financial Freedom Through DIY
Building your own cold plunge offers substantial cost savings. It's similar to building your own computer instead of buying a pre-built one. You get exactly what you want, often for much less. Many DIYers report saving thousands of dollars. This allows more people to experience the benefits of cold water therapy without emptying their wallets.
A simple DIY setup using a stock tank can cost only a few hundred dollars. Compare this to a similar commercial unit, which can easily cost thousands. The financial benefits are clear.
Let's take a closer look at the cost breakdown:
To better understand the financial implications of each option, let’s compare the costs of DIY cold plunges versus commercial units. The following table provides a detailed breakdown:
DIY vs. Commercial Cold Plunge Cost Comparison
Solution Type | Initial Cost | Maintenance Cost (Annual) | Lifespan | Cost per Year |
|---|---|---|---|---|
Basic DIY (Stock Tank) | $300 - $500 | $50 - $100 | 5-10 Years | $80 - $150 |
Advanced DIY (Wood/Fiberglass) | $1,000 - $2,000 | $100 - $200 | 10-15 Years | $167 - $333 |
Commercial Cold Plunge | $4,000 - $10,000+ | $200 - $500 | 5-10 Years | $600 - $1,500 |
As you can see, the DIY approach offers substantial savings over the lifespan of a cold plunge tub.
Customization: Your Plunge, Your Way
Beyond the financial advantages, a DIY cold plunge offers unmatched customization. Pre-built tubs have standard sizes and features, limiting your options. Building your own allows you to customize the dimensions, depth, and even the appearance to fit your space and preferences perfectly. Want a deeper plunge? A smaller size? With DIY, you are in control.
The Growing Community of Cold Plunge DIYers
The DIY cold plunge community is thriving online, with builders sharing tips, tricks, and new ideas. This collaborative environment encourages creativity and helps beginners avoid common mistakes. You can find numerous resources, from build guides to forums, making the process much less intimidating.
This shared experience also builds a sense of community among those following this wellness trend. The global cold plunge tub market is growing, valued at USD 337.7 million in 2024 and projected to reach USD 482.8 million by 2033. This represents a CAGR of 3.73%, fueled partly by the increasing popularity of DIY setups. You can explore this topic further here.
More Than Just a Money-Saving Hack
Ultimately, building a DIY cold plunge is about more than just saving money. It represents a proactive approach to health and wellness. Building your own plunge tub is a real investment in your well-being, both physically and mentally. You are not just saving money; you're actively participating in a healthier lifestyle. This, combined with the customization options, makes a DIY cold plunge a very attractive option.
Gathering Your Cold Plunge Arsenal: Materials That Matter
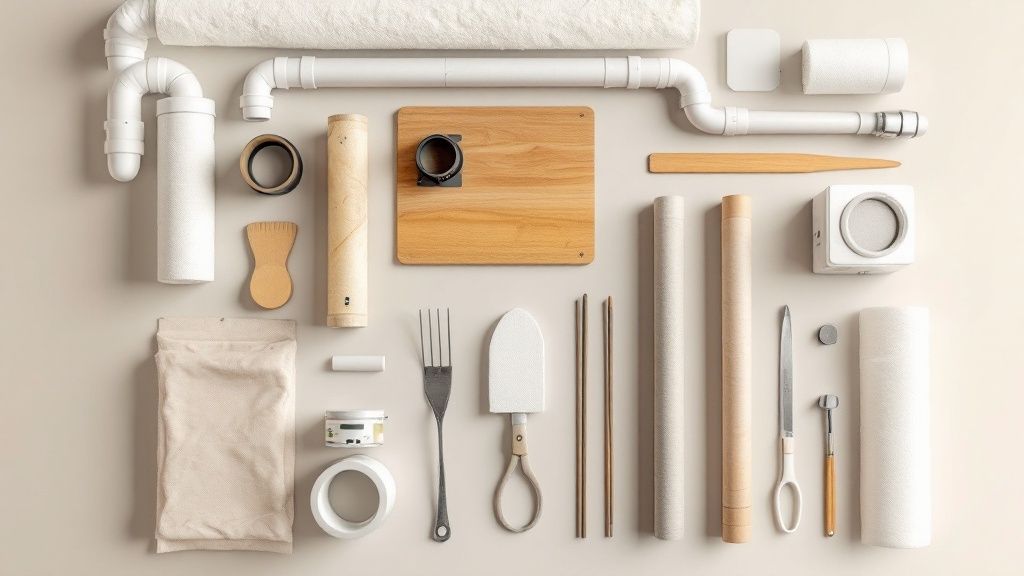
Building a DIY cold plunge tub is a rewarding project. But it requires careful selection of materials to ensure both functionality and durability. Just like a recipe, the quality of the ingredients determines the final product. Let’s break down the essentials.
Choosing Your Container: Stock Tanks vs. Freezers
The first decision is your container. Two popular options are stock tanks and converted freezers. Stock tanks, made from galvanized steel or polyethylene, are readily accessible and budget-friendly, offering a rustic look in various sizes. However, they require maintenance to prevent rust.
Repurposed chest freezers provide excellent insulation, vital for temperature control. While more durable, they require modification to ensure safety and prevent leaks. Consider your space and budget when deciding. This choice will impact the rest of your project.
Insulation: Keeping the Cold In
Effective insulation is key for maintaining cold water temperatures and minimizing energy use. Think of it like wrapping your plunge in a cozy blanket. Closed-cell spray foam, known for its insulating properties and adaptability, is a popular choice. It minimizes heat transfer, keeping the water cold for longer.
Rigid foam insulation boards offer another option, but they may not fill gaps as effectively. The better the insulation, the less your cooling system needs to work, saving energy and money over time.
Cooling Systems: From Ice to Chillers
Several cooling methods exist, each with pros and cons regarding cost and effectiveness. Using ice is the simplest method, but it requires constant replenishment. Chiller units, which automatically cool the water to a set temperature, are more efficient and convenient. While more expensive initially, chillers offer long-term savings.
A combination of ice and a smaller chiller can offer a balanced approach. Planning is essential here. Some builders opt for a basic setup initially and upgrade later. Starting with existing tubs or showers, cold tap water, and ice is common. A 55°F starting temperature is often recommended for beginners. However, managing ice can be tricky, and reusable ice packs are less effective than store-bought ice bags or homemade ice blocks. For more detailed information on DIY setups, check out this helpful resource: DIY cold plunge tub setups. Many DIYers eventually transition to more advanced systems with coolers, chillers, and pumps, sometimes building them for around $1,700, a considerable saving compared to the $2,800 to $6,900 price tag of a ready-made cold plunge.
Filtration and Sanitation: Keeping it Clean
Clean water is crucial for a healthy cold plunge. Filtration systems remove debris, while sanitation methods prevent bacterial and algal growth. A simple filter pump combined with a UV sterilizer effectively maintains water clarity and safety.
Some builders incorporate ozone generators for chemical-free sanitation. Regardless of the method, regular cleaning and maintenance are essential. A well-maintained plunge is a healthy plunge.
Accessorizing Your Cold Plunge
After the core components are in place, consider accessories to improve your experience. Steps or a sturdy ladder ease entry and exit. A thermometer allows for accurate temperature monitoring, and a cover helps retain the cold and prevent debris from entering. These small additions enhance usability and extend the life of your cold plunge. They're the final touches that make your creation truly yours.
Building Your Cold Plunge: A Step-by-Step Blueprint
Now that you've gathered your materials, let's dive into constructing your DIY cold plunge tub. This blueprint provides manageable steps, guiding you toward a successful outcome. Even novice DIYers can confidently create their own cold therapy oasis with these instructions and insights from experienced builders.
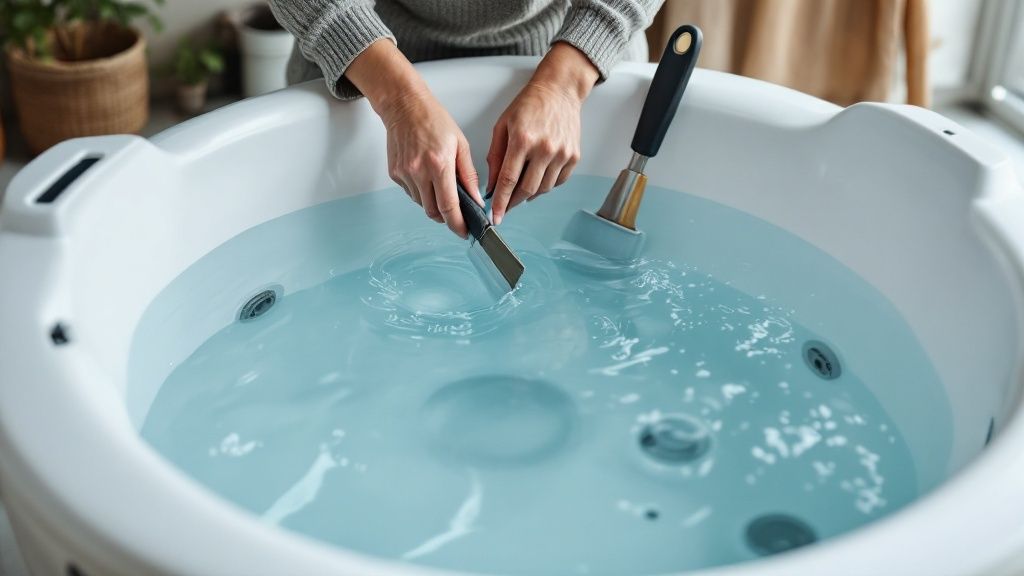
Preparing Your Container
This first step is the foundation for a leak-free and durable cold plunge. For stock tanks, carefully inspect for rust or damage and address any issues before proceeding. For repurposed freezers, ensure complete lid removal and safe disposal of internal components like compressors.
Clean and sanitize: Thoroughly clean the container with a suitable disinfectant to eliminate contaminants. This is especially crucial for repurposed freezers.
Seal any openings: Use an appropriate sealant, like silicone, for the container material to seal existing drain holes or openings. This prevents leaks and ensures a watertight cold plunge. This step is essential; a leaky tub becomes a significant problem.
Installing the Cooling System
Next, install your chosen cooling system. This involves deciding between ice or a chiller.
Ice bath setup: If using ice, designate an area within the tub for ice packs or bags. This helps maintain consistent cold temperatures without directly affecting the user.
Chiller installation: For chillers, meticulously follow the manufacturer's instructions. Ensure correct placement and secure connections to prevent leaks or performance problems. Precise installation is crucial for optimal chiller performance. This is a critical step in the process.
Insulating Your Cold Plunge
Insulation is essential for temperature stability and energy efficiency. Think of it like winterizing a house—better insulation equals lower energy bills. Similarly, effective insulation minimizes energy consumption in your cold plunge.
Spray foam application: If using spray foam, ensure complete and even coverage on all exterior container surfaces. This creates a seamless barrier against heat transfer.
Rigid foam installation: When using rigid foam boards, cut and fit them snugly against the container walls. Seal any gaps or seams with adhesive tape or sealant to prevent heat infiltration. Precise fitting is key for optimal insulation.
Adding the Filtration System
Maintaining clean water is paramount. Integrate your chosen filtration system now. Proper installation prevents debris and bacterial growth, keeping your cold plunge clean and hygienic.
Pump placement and connection: Position the pump according to the manufacturer's instructions. Securely connect the intake and output hoses to the pump and their designated locations within the container. Test the system for proper flow and pressure.
Filter and sterilizer integration: Install the filter and UV sterilizer according to their instructions, ensuring correct connections to the pump system. This maintains clean, clear water.
Final Touches and Testing
With the main components installed, focus on finishing details like access steps, a thermometer, and a cover.
Accessibility: Install steps or a ladder for safe and easy entry and exit. Consider the container's height and user comfort.
Temperature monitoring: Mount a waterproof thermometer in a readily visible spot. This allows for easy temperature monitoring and adjustments. Consistent temperature is crucial for an effective cold plunge.
Protective cover: A cover prevents debris and helps maintain cold water temperatures, reducing the cooling system's workload.
Different DIY Cold Plunge Build Options
The table below provides an overview of different DIY cold plunge tub build options, comparing complexity, cost, and features.
Build Type | Difficulty Level | Cost Range | Temperature Control | Maintenance Required | Best For |
|---|---|---|---|---|---|
Basic Ice Bath (Tub/Cooler) | Beginner | $50 - $200 | Manual (Ice) | Low | Occasional Use, Budget-Conscious |
Stock Tank with Chiller | Intermediate | $500 - $1,500 | Chiller Unit | Moderate | Regular Use, Moderate Budget |
Converted Freezer | Advanced | $800 - $2,500 | Chiller Unit | Low | Frequent Use, Optimal Insulation |
Custom-Built (Wood/Fiberglass) | Expert | $1,500+ | Chiller Unit | High | Personalized Design, Long-Term Use |
This table summarizes the key differences between the four main DIY cold plunge approaches. The basic ice bath is the most affordable and easiest to build but requires manual temperature control with ice. The stock tank with chiller offers a balance of cost and convenience. Converted freezers provide excellent insulation but require more advanced DIY skills. Custom-built plunges offer the most personalization but come at a higher cost and require expert-level construction.
Finally, fill your cold plunge and test the entire system. Ensure there are no leaks, the cooling system works correctly, and the filtration system keeps the water clear. Thorough testing ensures your cold plunge is ready for invigorating therapy. Building your own DIY cold plunge tub is a rewarding experience, providing a personalized wellness space tailored to your needs and budget.
Mastering the Perfect Chill: Temperature Control Secrets
Achieving the ideal temperature is key for an effective cold plunge. It's the difference between a refreshing, beneficial experience and an uncomfortably cold one. This involves understanding the various cooling methods and how to maintain consistent, invigorating temperatures without breaking the bank.
Cooling Methods: Finding the Right Balance
Different cooling methods exist to suit various budgets and lifestyles. Each has pros and cons to consider based on your individual needs. Choosing the right method will ensure both a comfortable plunge and efficient operation.
Ice Rotation Systems: This economical approach uses ice to cool the water. It's easy to set up but requires regular ice replenishment. This makes it a more hands-on method. For occasional plungers, this is a viable starting point.
Chiller Units: These self-contained units automatically cool the water, providing precise temperature control and convenience. Chiller units represent a larger upfront investment but minimize ongoing effort and deliver consistent performance. This is often the preferred method for those who plunge regularly.
Hybrid Approach: Combining ice with a smaller chiller can offer a good middle ground. This setup can lower the initial cost and reduce the chiller's workload, creating a balance between cost and convenience.
Insulation: Your Secret Weapon for Efficiency
Proper insulation is essential for maintaining a stable temperature and minimizing energy use. Just as a well-insulated house retains heat, an insulated cold plunge tub preserves the cold. This, in turn, reduces the workload on your cooling system. The result? Lower operating costs and a more consistent temperature.
Closed-Cell Spray Foam: This option provides superior insulation, conforming to any shape. This makes it perfect for sealing gaps and establishing a complete thermal barrier. It minimizes heat transfer, helping the water stay cold longer.
Rigid Foam Insulation Boards: These boards are easier to install, though they might not seal gaps as effectively. They represent a good balance of cost and performance. Layering the boards can further improve insulation. However, you'll need to ensure that all seams are properly sealed.
Choosing the right insulation is important. The ongoing cost of running a cold plunge can discourage some people from taking the plunge. Using a basic stock tank without insulation can lead to higher energy bills, particularly in warmer regions. A well-insulated setup, despite a larger initial cost, often results in lower running costs in the long term. Learn more about the cost considerations of cold plunge tubs here.
Water Treatment and Maintenance: Ensuring Longevity
Maintaining clean water is crucial. Filtration and sanitation help prevent bacteria growth and ensure your cold plunge remains a hygienic and inviting experience. This also prolongs the life of your system.
Filtration Systems: A basic filter pump helps remove debris and keeps the water clear. Regularly changing the filters is key for optimal performance.
Sanitation: UV sterilizers and ozone generators offer chemical-free sanitation, which prevents bacterial and algal growth. These methods promote a healthy and safe plunge environment.
Regular maintenance is key for best performance and longevity. This involves cleaning the tub, checking for leaks, and making sure the cooling system is working correctly. Preventative maintenance will save you money and keep your cold plunge tub working optimally.
Monitoring for Consistent Results
Regular monitoring ensures your cold plunge delivers consistent temperature and water quality. It also allows you to track the system's performance and make adjustments as needed.
Thermometers: Use a reliable, waterproof thermometer to track the water temperature. Digital thermometers with remote monitoring capabilities add convenience, allowing you to check the temperature without accessing the tub.
Smart Home Integration: Integrating your cold plunge with a smart home system provides automated temperature control and monitoring. This approach provides the ultimate convenience and control.
By following these temperature control strategies, you can build a DIY cold plunge tub that provides a refreshing and revitalizing experience every time. This careful approach elevates the DIY cold plunge from a simple project into a personalized oasis of wellness.
Crafting Your Personal Cold Plunge Practice
Building your DIY cold plunge tub is a major achievement. But the real adventure begins with establishing a consistent and beneficial cold plunge practice. This goes beyond simply jumping into frigid water. It's about designing a sustainable routine that works with your wellness objectives. Think of it like a new workout plan – consistency and proper form are essential for achieving the results you want.
Building Cold Tolerance: Gradual Progression is Key
Just as you wouldn't begin weight training with the heaviest weights, you shouldn't shock your body with icy water right away. Start with shorter plunges and gradually lower the temperature and increase the time as your body adjusts. This helps you build cold tolerance safely and effectively.
Start Slow: Begin with water temperatures around 50-60°F for 1-2 minutes.
Listen to Your Body: Pay attention to how your body feels. Some shivering is expected, but if you experience excessive shivering or discomfort, it's time to get out.
Gradual Progression: Gradually decrease the water temperature by a degree or two each session, and increase your plunge time by 30-60 seconds when you feel ready.
Timing Your Plunges: Optimizing for Benefits
When you choose to take your cold plunges can affect their impact. Many people prefer morning plunges to boost energy and alertness, working with their natural circadian rhythms. Experimenting with different times, however, helps you figure out what's best for your body and schedule. Some people find evening plunges promote relaxation and better sleep.
How often you plunge also varies. A study showed that while most people (82.6%) either only take cold showers or don't do cold water therapy at all, a dedicated group incorporates regular plunges into their routines, with 6.3% averaging 5-7 plunges a week. You can learn more about cold plunge frequency here. This demonstrates the spectrum of approaches, underscoring the importance of finding what works best for you.
Complementary Practices: Enhancing Your Cold Plunge
Combining your cold plunge with other wellness activities can boost the overall benefits.
Warm-up: Light exercise before your plunge can help prepare your body for the cold.
Deep Breathing: Practicing controlled breathing during your plunge helps regulate your body's response to the cold.
Post-Plunge Warm-down: Light movement or stretching after your plunge can help your body warm back up and improve circulation. Think of it like a cool-down after a workout.
Troubleshooting Plateaus and Managing Expectations
It's perfectly normal to hit plateaus in your cold tolerance. Don't be discouraged. Adjusting things like water temperature or plunge duration can help you push through these plateaus.
Vary Your Routine: Experiment with alternating between shorter, colder plunges and longer, less cold plunges to keep your body adapting.
Focus on Consistency: Regular practice is more valuable than pushing yourself too hard too soon.
Realistic Expectations: Everyone responds differently to cold therapy. Be patient with your progress and celebrate your achievements.
By approaching your cold plunge routine with intention and mindfulness, you'll maximize the advantages and turn your DIY cold plunge tub into a powerful tool for improving your overall well-being. It's not simply about withstanding the cold, but about leveraging its potential to enhance your health and vitality.
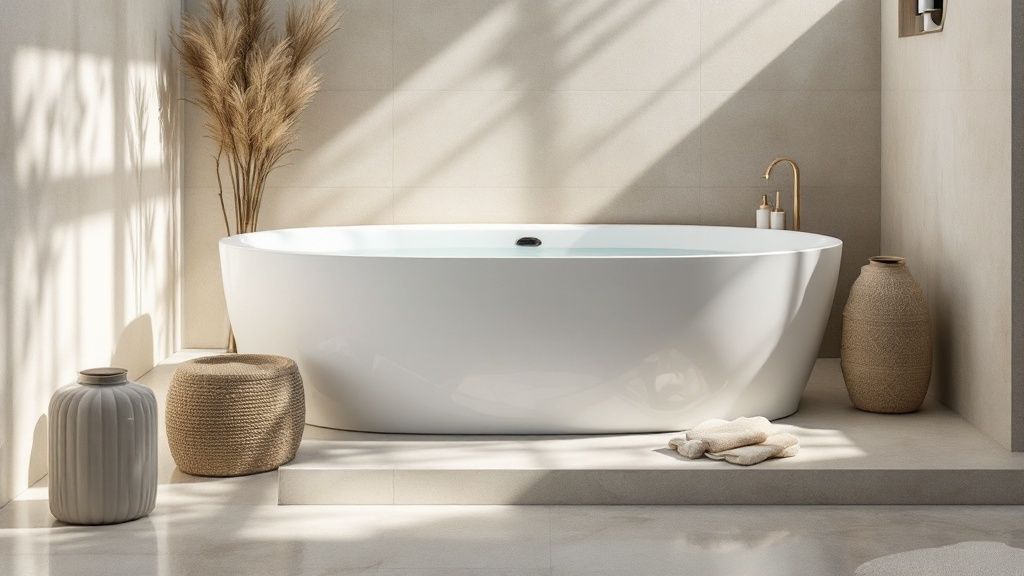
Design Inspiration: Cold Plunge Tubs Worth Showing Off
Building a functional cold plunge tub DIY is a rewarding feat. But why settle for mere functionality? A touch of creativity can transform your cold plunge into a chic element of your home, a wellness focal point you'll be eager to share. This isn't about relegating a practical tub to the basement; it's about crafting a space that invigorates both body and mind.
Materials and Design: Elevating the Aesthetics
The materials you select significantly influence the overall look and feel of your cold plunge. Think beyond standard stock tanks. Consider cedarwood for an organic, spa-like ambiance. Alternatively, concrete offers a modern, minimalist aesthetic. Even a basic stock tank can be elevated with a dark stain or a coat of exterior paint that harmonizes with your home's existing design.
Wood: Cedar, redwood, or other weather-resistant lumber options infuse warmth and natural beauty.
Concrete: A polished and contemporary choice, concrete allows customization through various finishes.
Metal: Stock tanks or custom-fabricated metal tubs provide durability and an industrial aesthetic.
Tile: Tile surrounds enhance visual appeal and create a waterproof barrier.
Integrating Your Cold Plunge: Indoor vs. Outdoor
The location of your cold plunge significantly impacts its design. An indoor plunge demands seamless integration with your current decor. Minimalist designs that complement modern aesthetics are often ideal. A sleek enclosure, perhaps crafted from wood and glass, can evoke a spa-like atmosphere within your home.
Indoor Plunges: Integrate smoothly with bathroom or spa areas. Consider space limitations and ventilation.
Outdoor Plunges: Create a backyard retreat with landscaping and decking. Account for weather protection and privacy.
Outdoor plunges offer greater design flexibility. Picture a plunge nestled amidst a vibrant garden, encircled by a deck, and illuminated by strategically placed lighting. This elevates the experience to a ritual, a serene moment of connection with nature.
Lighting: Setting the Mood
Lighting dramatically affects the ambiance of your cold plunge area. Subtle lighting within the tub creates a tranquil and inviting mood. Strategically positioned landscape lighting around an outdoor plunge adds a touch of enchantment, highlighting the natural beauty of the surroundings.
Underwater Lighting: Creates a soothing and ethereal glow.
Ambient Lighting: Sets the mood and enhances the surrounding environment.
String Lights: Add a festive touch to outdoor setups.
Surroundings and Storage: Practicality Meets Style
The area surrounding your cold plunge is just as crucial as the tub itself. Decking or paving stones create a safe and inviting space for entering and exiting the plunge. Consider incorporating storage solutions for towels, robes, and other necessities. These can be integrated seamlessly into the overall design, preserving a clean, uncluttered aesthetic.
Decking: Provides a stable and visually appealing surface around the plunge.
Paving Stones: Create a natural and long-lasting pathway.
Storage Benches: Offer seating and hidden storage for essential items.
The cold plunge tub market has seen a surge in popularity, influenced by celebrities and athletes who have embraced cold water immersion. Figures like LeBron James and Naomi Osaka have publicly touted its benefits, fueling demand in both commercial and residential settings. Learn more about the cold plunge market here. This trend underscores the growing recognition of cold plunges as valuable wellness tools, inspiring innovative design approaches for home installations.
By carefully considering these design elements, you can create a cold plunge area that is not only functional but also a visually stunning and welcoming retreat within your home. It becomes a reflection of your commitment to well-being, a space you'll genuinely cherish.
Ready to enhance your sauna experience and monitor your progress? Explore Sauna Tracker, a comprehensive sauna companion app designed for iPhone and Apple Watch. Track your sessions, monitor your health metrics, and achieve your sauna goals with this user-friendly app. Download Sauna Tracker today at https://www.saunatracker.app and embark on a journey to optimize your wellness routine.